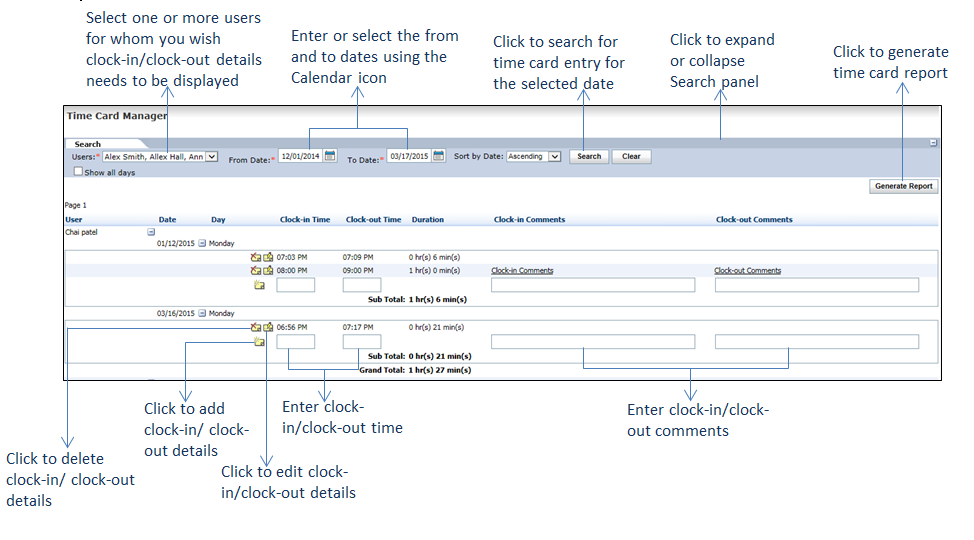
The system enables the practice admin user to add, update, or delete the time card entries for each user from this section.
To add, update, or delete the time card entry on behalf of a practice user:
| 1. | From the left menu items, click Tools > My Time Card. The Time Card Manager screen opens. |
| 2. | Click the Plus sign (+) in the top right corner to expand the Search panel. |
| 3. | Select the period for which you want to add the time card. This field is mandatory. |
| 4. | Select the user(s) for whom you want to add the time card. This field is mandatory. |
| 5. | Select the Sort by Date option as Ascending or Descending to sort the time card entries. |
| 7. | Expand the date and day column and do the following: |
| • | To add the clock-in date, clock-out date, clock-in comments, or clock-out comments, and click the  icon. icon. |
| • | If you are not able to see the day or date for which you want to update time card entry, select the Show all days check box from the top to view all entries. |
| • | To edit the clock-in and clock-out dates and clock-in and clock-out comments, click the  icon. icon. |
| • | To delete the time card details, click the  icon. icon. |
| 8. | To generate the report for the selected date range, click Generate Report. |


